
When Amy asked me whether or not I would be able to top last year, all I wrote her back was, "it's been topped," and quite frankly I think it is a safe bet to reiterate that.
Momochi was alive, and livin' large. Yes, I went with a ridiculously oversized hat as well as a large oversized torch. The only decent picture I actually have is from Chris' camera (thanks Chris in advance, none of my pictures are as good or appropriate). I also included some pictures of the torch on the lovely runway model known as Nancy so you can get an idea of it's ridiculous proportions and looks.


Now you may all be wondering how I managed to make such a monstrous (and yes, cool) hat. I took pictures to demonstrate the steps.
It began on a Tuesday morning with me covering my head in seran wrap and self-papermache'ing my head. Afterwards, I ended up borrowing Ashley's hairdryer to help it set, then let it dry fully. Later I ended up putting on a second layer to strengthen the "helmet" for my star hat.
Next up, I went to the drawing board (using school time of course). I decided the tip of each point on the star to the tip of another I wanted to be 1 meter. Then figured that I wanted the pentagon to have a side of a little under a third, finding online that somewhere around 30% is the visually aesthetic star body to point-point length. Therefore I decided 26 centimeters for the pentagon edge. Going online again, I found out the measurements for the center of a side of the pentagon to the center of the pentagon. Lastly, I decided that the hat would be 15cm high.
With all that set, I set out to make the cardboard pieces of the hat. This required painfully cutting out each piece to fairly exact dimension 5 times over (since a pentagon has five sides). The first picture you see is actually all 5 pieces completed (I measured out the appropriate notch distances too so that all the pieces would interlock accordingly. I realized afterwards though, that when I cut out the pieces I should've taken into account the tapering to a point, but instead cut that afterwards which proved to be annoying and should've been avoided). Afterwards, I glued all of these together, leaving me with 5 exactly alike shapes which you see below.
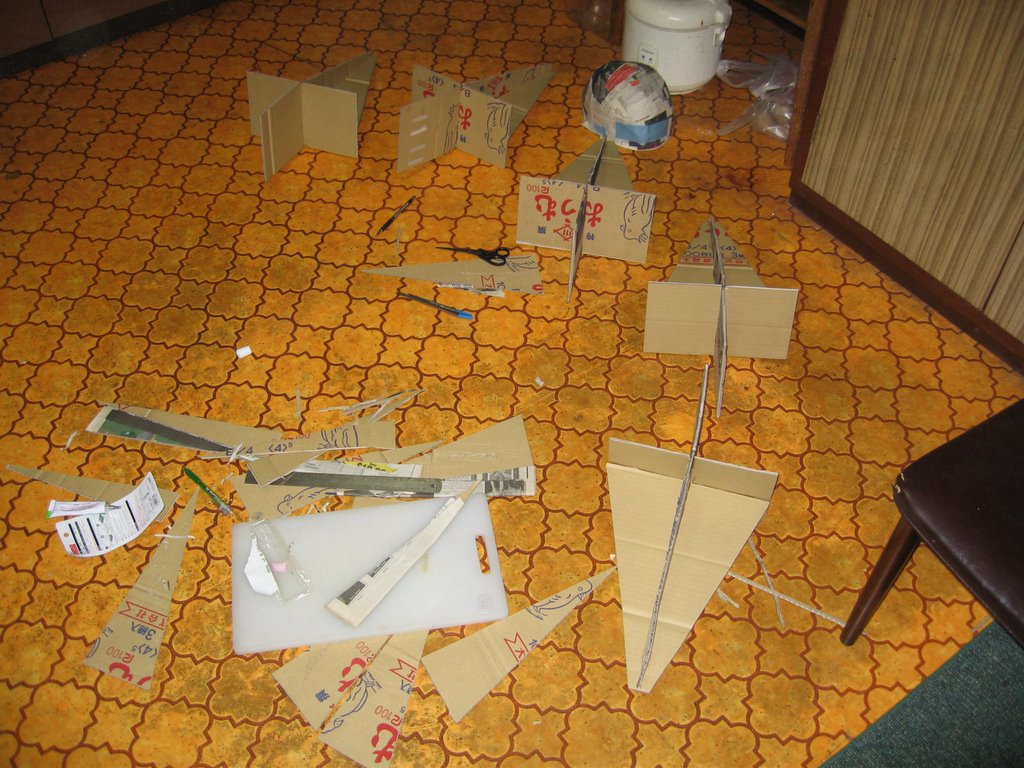
Then the test, taking those five, and taping them together. The reason for the cardboard extending to the middle was because I figured (and rightly so), that this would make the entire structure much more rigid and sound, and be a good base for the hat as well as something to mount the helmet directly to.

If you look at this picture, you'll see some cardboard look like newspapers. That's because I thought since the cardboard cutouts were made over bends in the cardboard (taken from boxes that weren't that big, so couldn't get flat sides), I thought that paper-mache'ing the outside would make them strong. This was a nearly fatal mistake, proving instead to weaken the cardboard due to the water/flour mix in paper-mache, and gave me limp pieces instead. They dried half-way when I put them on, and seemed like they would stiffen further, so I deemed it okay to continue.
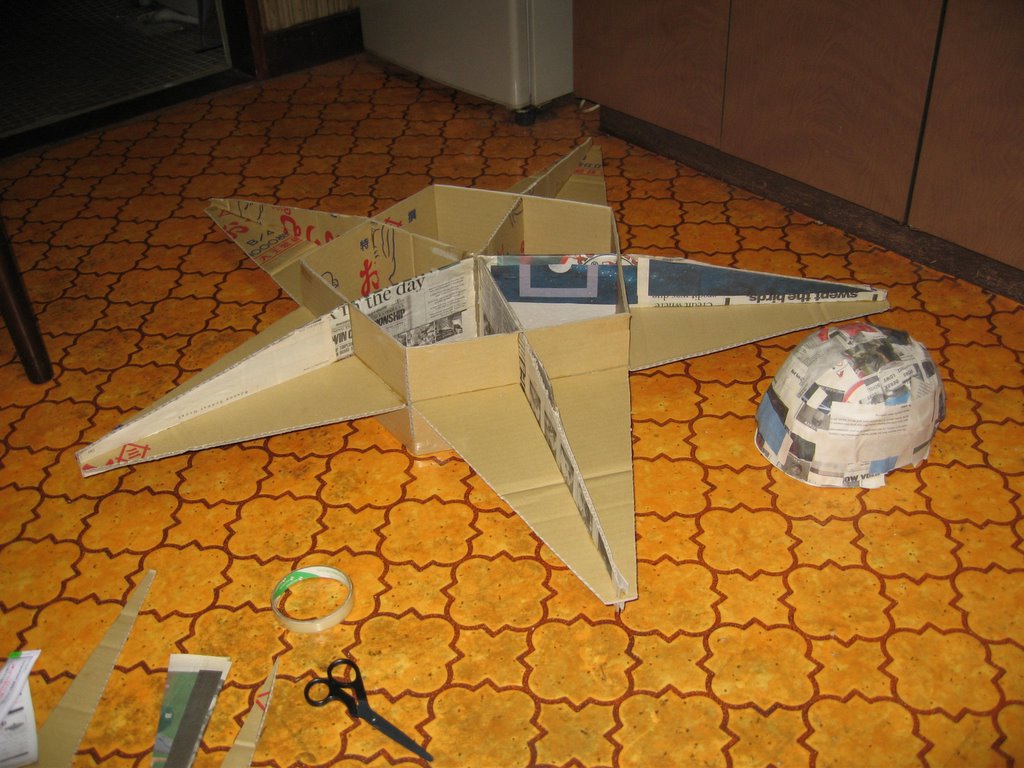
After this I cut out a little bit of the bottom of the triangle, and putting in the helmet went to the mirror and took a guess with a pen at what really should be cut out for the hat to fit snugly. This was daunting, seeing as a messup could prove difficult/time-staking to fit. Luckily all went well, and the headpiece was firmly glued into the framework (twice actually, just to make sure).


Lastly, another seriously tedious part, was to then take long, white A5 sheets of paper (8.5"x17"), and tape them around the points, top, and bottom. Each point required 4 sheets (a sheet for each quarter of the point), and the top and bottom I just used paper and tape cuz I was getting really fed up (in retrospect that was a mistake because the spray paint did not stick to the plastic tape very well at all). No pictures of this, but as you can imagine, it was not fun, and very very very very annoying.
Last but not least, I wasted an entire can of yellow spray paint to get the sucker yellow. I also made a torch, but didn't take anything but the end picture. Cool things about the torch are the two tubes which i used for the frame, adding paper around one to make it fit snugly into the other, and the bottle top inserted in the top to hold a flashlight which backlit the red celophane to give the appearance of flames. Here is the final picture of both...

So yes, that completes the costume. I actually thought it was lost after Saturday night's party (I gave it to Yarek after figuring the hat's time was done, but luckily Sarah picked it up and will give it back to me this weekend), but no, it lives on. I will weigh it since people were curious as to its actually weight.
1 comment:
That really is a marvel of engineering.
Well done MomoNeil!
Post a Comment